The menu bar is the series of menus running across the top left of the editor's title bar. It provides organized access to many actions which are described on this page.
Clicking File, Edit, Layer, Select, View, Window, and Help opens a dropdown menu with clickable actions. Pay attention to the keyboard shortcut listed on the right of each row in the dropdown menus. Learning to use them can help speed up your workflow.
Menu actions reference
The rest of this page is intended as a reference resource. Skip ahead to the next page if this is your first read-through of the manual.
App button
The app button appears as the Graphite logo. Clicking it opens the website home page.
File
The File menu lists actions related to file handling:
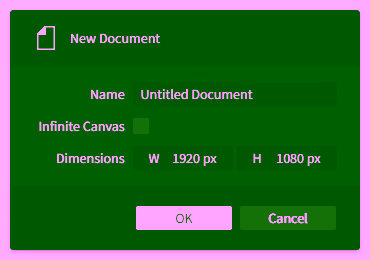
| New… | Opens the New Document dialog for creating a blank canvas in a new editor tab.
|
| Open… | Opens the operating system file picker dialog for selecting a |
| Open Demo Artwork… | Opens the Demo Artwork dialog for loading a choice of premade sample artwork files provided for you to explore. Click the button below each image to open it.
|
| Close | Closes the active document. If it has unsaved changes (denoted by the |
| Close All | Closes all open documents. To avoid accidentally losing unsaved work, you will be asked to confirm that you want to proceed which will discard the unsaved changes in all open documents. |
| Save | Saves the active document by writing the |
| Import… | Opens the operating system file picker dialog for selecting an image file from disk to be placed as a new bitmap image layer or SVG content into the active document. |
| Export… | Opens the Export dialog for saving the artwork as a File Type of PNG, JPG, or SVG. Scale Factor multiplies the content's document scale, so a value of 2 would export 300x400 content as 600x800 pixels. Bounds picks what area to render: All Artwork uses the bounding box of all layers, Selection uses the bounding box of the currently selected layers, and an Artboard: [Name] uses the bounds of that artboard. Transparency exports PNG or SVG files with transparency instead of the artboard background color. |
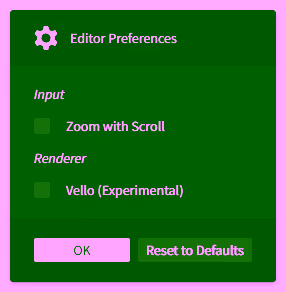
| Preferences… | Opens the Editor Preferences dialog for configuring Graphite's settings. |


Edit
The Edit menu lists actions related to the editing workflow:
| Undo | Steps back in the history of changes in the active document. |
| Redo | Steps forward in the history of changes in the active document. |
| Cut | Copies the selected layer(s) to the clipboard, then deletes them. |
| Copy | Copies the selected layer(s) to the clipboard. |
| Paste | Pastes the copied layer(s) from the clipboard into the document. It will end up directly above the selected layer, or otherwise at the base of the folder structure. In the web version of Graphite, your browser will ask for permission to read from your clipboard which you must grant; alternatively, using the hotkey CtrlV (macOS: ⌘V) works without the browser needing this permission. |
| Duplicate | Creates a copy of the selected layer(s) directly above their original(s) in the layer stack. |
| Delete | Removes all selected layers and folders. |
| Convert to Infinite Canvas | Replaces all artboards in the document with standard layers. With no artboards present, the document becomes an infinite canvas. |
Layer
The Layer menu lists actions related to the layers within a document:
| New | Creates a new layer in the active document. It will end up directly above the selected layer, or otherwise at the base of the folder structure. |
| Group | Creates a new folder in place of the selected layer(s), then moves them into that folder. |
| Ungroup | Removes the selected folder(s), moving their contents up one level in the layer stack. |
| Hide/Show | Toggles visibility of the selected layer(s), including or excluding them from rendering as part of the artwork. |
| Lock/Unlock | Toggles the locked state of the selected layer(s), preventing them from being selected by tools in the viewport. |
| Grab | Begin grabbing the selected layer(s) to translate (move) them around with your cursor's movement. Lock to an axis with X or Y then use the number keys to type a pixel distance value. Confirm with a left click or Enter. Cancel with a right click or Esc. |
| Rotate | Begin rotating the selected layer(s) around their pivot point with your cursor's movement. Use the number keys to type an angle value in degrees. Confirm with a left click or Enter. Cancel with a right click or Esc. |
| Scale | Begin scaling the selected layer(s) around their pivot point with your cursor's movement. Lock to an axis with X or Y. Use the number keys to type a scale multiplier value. Confirm with a left click or Enter. Cancel with a right click or Esc. |
| Arrange > Raise to Front | Reorders the selected layer(s) above all others within their same folder(s), so they appear in the layer stack and render above those other layers. |
| Arrange > Raise | Reorders the selected layers(s) up by one in the layer stack, so any layer that was immediately above the selected layer(s) ends up immediately below. |
| Arrange > Lower | Reorders the selected layers(s) down by one in the layer stack, so any layer that was immediately below the selected layer(s) ends up immediately above. |
| Arrange > Lower to Back | Reorders the selected layer(s) below all others within their same folder(s), so they appear in the layer stack and render below those other layers. |
| Arrange > Reverse | Reorders the selected layers by swapping their positions from top to bottom. Reversal applies amongst each set of selected sibling layers (those with a shared parent). |
| Align > Align Left | Moves the selected layer(s) so their left edges line up with the leftmost edge of the selection's bounding box. |
| Align > Align Horizontal Center | Moves the selected layer(s) so their horizontal centers line up with the horizontal center of the selection's bounding box. |
| Align > Align Right | Moves the selected layer(s) so their right edges line up with the rightmost edge of the selection's bounding box. |
| Align > Align Top | Moves the selected layer(s) so their top edges line up with the topmost edge of the selection's bounding box. |
| Align > Align Vertical Center | Moves the selected layer(s) so their vertical centers line up with the vertical center of the selection's bounding box. |
| Align > Align Bottom | Moves the selected layer(s) so their bottom edges line up with the bottommost edge of the selection's bounding box. |
| Flip > Flip Horizontal | Reflects the selected layer(s) horizontally within the selection's bounding box. |
| Flip > Flip Vertical | Reflects the selected layer(s) vertically within the selection's bounding box. |
| Turn > Turn -90° | Rotates the selected layer(s) a quarter turn counterclockwise about the selection's bounding box center. |
| Turn > Turn 90° | Rotates the selected layer(s) a quarter turn clockwise about the selection's bounding box center. |
| Boolean > Union | Combines all paths of the selected vector layer(s) while cutting out overlapping areas (even the interiors of a single path) |
| Boolean > Subtract Front | Cuts overlapping areas out from the last of the selected vector layers. |
| Boolean > Subtract Back | Cuts overlapping areas out from the first of the selected vector layers. |
| Boolean > Intersect | Cuts away all but the overlapping areas shared by every path of the selected vector layer(s). |
| Boolean > Difference | Cuts away the overlapping areas shared by every path of the selected vector layer(s), leaving only the non-overlapping areas. |
| Make Path Editable | Applies a path edit operation (the Path node) to the selected vector layer, capturing the geometry after other nondestructive operations to enable its direct modification by the Path and Pen tools. |
Select
The Select menu lists actions related to the selection of layers within a document:
| Select All | Selects all layers and folders in the document. |
| Deselect All | Deselects everything in the document. |
| Select Parent | Selects the parent folder(s) of the currently selected layer(s). |
| Previous Selection | Goes back to the previously selected set of layers or nodes in the selection history. If the side of your mouse has navigation buttons, you can use the back button as a shortcut (not supported in Firefox). |
| Next Selection | Goes forward to the next selected set of layers or nodes in the selection history. If the side of your mouse has navigation buttons, you can use the forward button as a shortcut (not supported in Firefox). |
View
The View menu lists actions related to the view of the canvas within the viewport:
| Tilt | Begins tilting the viewport angle based on your mouse movements. While tilting, hold Shift to snap to 15° increments. Confirm with a left click or Enter. Cancel with a right click or Esc. |
| Reset Tilt | Sets the viewport tilt angle back to 0°. |
| Zoom In | Narrows the view to the next whole zoom increment, such as: 25%, 33.33%, 40%, 50%, 66.67%, 80%, 100%, 125%, 160%, 200%, 250%, 320%, 400%, 500% |
| Zoom Out | Widens the view to the next whole zoom increment, such as above. |
| Zoom to Selection | Zooms and frames the viewport to the bounding box of the selected layer(s). |
| Zoom to Fit | Zooms and frames the viewport to fit all artboards, or all artwork if using infinite canvas. |
| Zoom to 100% | Zooms the viewport in or out to 100% scale, making the document and viewport scales match 1:1. |
| Zoom to 200% | Zooms the viewport in or out to 200% scale, displaying the artwork at twice the actual size. |
| Flip | Mirrors the viewport horizontally, flipping the view of the artwork until deactivated. |
| Rulers | Toggles visibility of the rulers along the top/left edges of the viewport. |
Window
The Window menu lists actions related to the visibility of workspace panels within the application window:
| Properties | Toggles visibility of the Properties panel on the upper-right side of the workspace. It is used to inspect and edit the values of graphics operation (node) parameters. Selected layers or nodes display their parametric controls in this panel. |
| Layers | Toggles visibility of the Layers panel on the lower-right side of the workspace. It is used to organize and select the artboards and layers that form the structure of a document. |
| Data | Toggles visibility of the Data panel on the lower-left side of the workspace. It is used to introspect data flow from the output of a selected node for technical debugging of content generated within the node graph. |
Help
The Help menu lists actions related to information about Graphite:
| About Graphite… | Opens the About Graphite dialog for displaying release and license information. You can check it for the release date of the current editor version. |
| User Manual | Opens this user manual. |
| Donate to Graphite | Opens the Graphite development fund page where you can contribute financially to support ongoing development of the project. |
| Report a Bug | Opens a page to file a new GitHub issue. |
| Visit on GitHub | Opens the Graphite GitHub repository. |
| Developer Debug | A section with developer-only actions. Users should ignore these. |